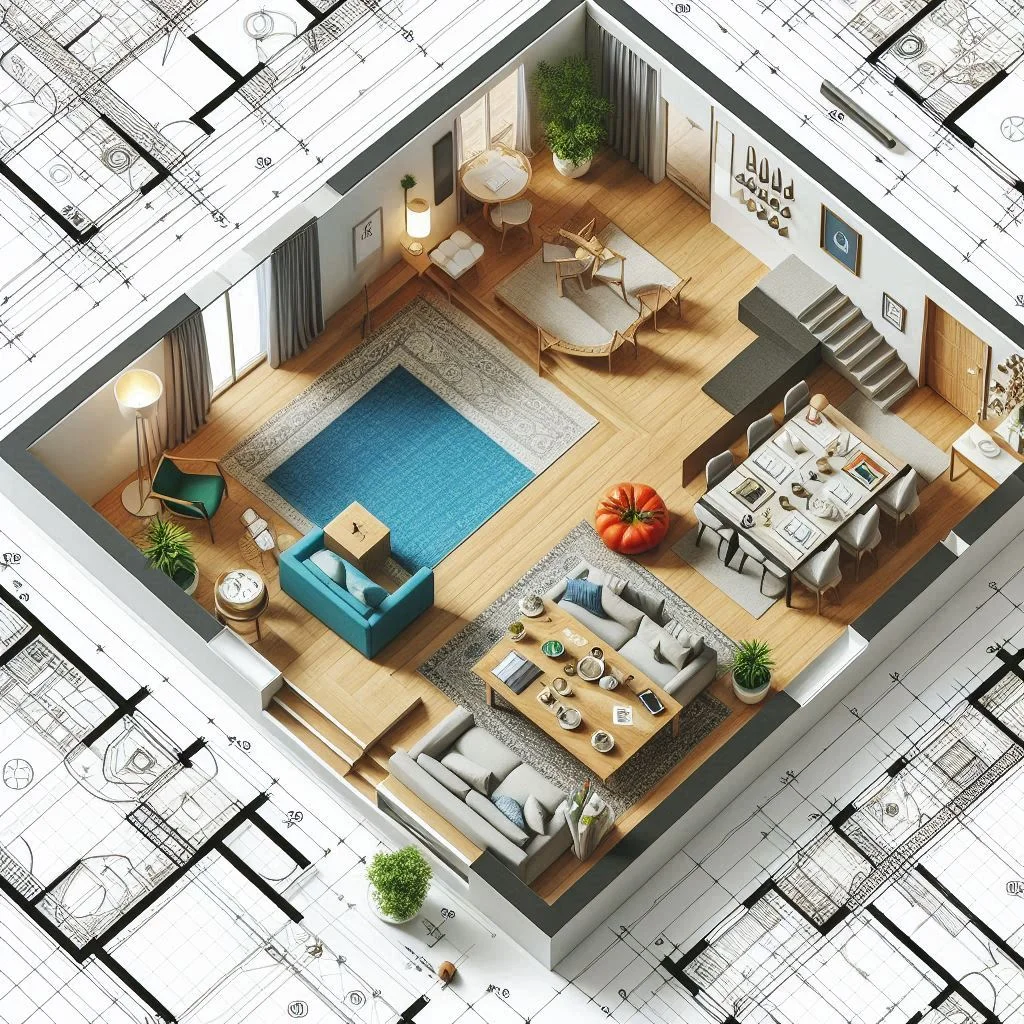
How to Design Detailed Room Layouts for Architectural Floor Plans

- Understanding the Requirements
- Title Block Essentials
- Title/Project Sheet
- Site Plan (1:200 Scales)
- Checklist for Site Plan:
- Building Plans (1:100 Scale)
- Checklist for Building Plans:
- Construction Notes for Building Plans:
- Roof Plan (1:100 Scales)
- Checklist for Roof Plan:
- Elevations (1:100 Scale)
- Checklist for Elevations:
- Sections (1:100 Scale)
- Checklist for Sections:
- Graphics Checklist (Appendix B)
- Graphics Checklist:
- Tips for a Successful Submission
- Common Mistakes to Avoid
- Tools and Software
- Additional Resources
- Finalizing Your Submission
- Conclusion
Architectural drawing assignments can be challenging, especially when they require a detailed set of plans, elevations, sections, and other elements in a single PDF file. This comprehensive guide will help you create an architectural drawing submission that includes everything from project sheets to sections. We’ll cover essential checklists, best practices, and tips to help you excel in your assignments.
Whether you're working on your own or seeking expert help, understanding how to draft detailed room layouts is crucial. Floor plan assignment helper ensures that your drawings are both professional and precise. You'll need to carefully include each component—such as site plans, elevations, and sections—while adhering to required standards.
Following a structured approach can significantly enhance the quality of your work. Be sure to check all dimensions, labels, and scales to avoid common errors. By utilizing expert resources like AutoCAD assignment help and focusing on meticulous drafting practices, you can improve your submissions and achieve better results in your architectural assignments.
Understanding the Requirements
Your architectural drawing assignment includes the following elements:
- A000 Project Sheet - Perspectives
- A100 Site Plan
- A101 Ground Floor Plan
- A102 Roof Plan
- A200 Elevations E01 E02
- A200 Elevations E03 E04
- A300 Sections S01 S02
All drawings must be submitted in a single PDF file. Multiple PDF files will result in a markdown. Avoid submitting your ArchiCAD file. Let’s delve into each component and understand the key aspects you need to include.
Title Block Essentials
Each sheet should have a title block that includes:
- Site address
- Your project number and client's contract number (fictional)
- QA check-box (issued for, drawn by, reviewed by, sign-off, and dates)
- Drawing numbers and revision numbers
- Sheet number (e.g., A01, A02, etc. - A for Architecturals)
- Scale
- Graphic-bar scale (in case drawings are reduced or enlarged)
The title block is essential as it provides critical information about the project and the specific drawing. It ensures that anyone reviewing the plans can easily understand the context, scale, and revisions of each drawing.
Title/Project Sheet
The title sheet provides a summary of the documents you are submitting. It should include:
- Job/Contract number (Unit Number, Assessment Task Name & Number)
- Project name
- Site address
- List of all drawings with drawing numbers and scale
- Coloured, rendered, shaded perspective views illustrating the design proposal
This sheet acts as the cover page for your submission, giving an overview of what is included and setting the stage for the detailed drawings that follow.
Site Plan (1:200 Scales)
The site plan should show the project locality, site context, and conditions, including the scope of the project. Depending on the project size, it might include:
- Roof Plan with roof fall arrows
- Site access, driveways, paths, landscaping, fences
- Boundaries, boundary setbacks, ground spot levels, and design levels
Checklist for Site Plan:
- Position of the site, adjacent roads, access points, roof plan over, landscaping, hard paving, and planting layout, driveway, paths, fences
- North point
- Scale
- Survey information such as site boundaries and building lines
- Clear-site and building set-out dimensions
- Identification of retaining walls, outcroppings, and site features to be conserved
- Adjoining buildings and structures in plan only
The site plan provides a comprehensive view of the project in its broader context, showcasing how the proposed building fits within its environment.
Building Plans (1:100 Scale)
Include building floor plans and roof plans with a consistent scale and orientation across all floor plans.
Checklist for Building Plans:
- Drawing title/label
- North point (for plans only)
- Scale
- Section references markers
- Elevation reference markers
- All dimensions referring to AS1100.301 Architectural Drawing
- Room names
- Fittings and fixtures like kitchens, WCs, showers, wardrobes (avoid loose furniture like sofas, dining tables, beds)
- Finished floor materials labelled (e.g., Tim for timber floor, Tile, Conc. for concrete driveway)
- Adjacent roads, access points, dashed roof plan over, landscaping, hard paving, and planting layout, driveway, paths, fences
Construction Notes for Building Plans:
- Materials and finishes (roof plan)
- Fall direction (roof plan)
- Solar panels (roof plan)
- Skylights, if any (roof plan)
- Roof vents (shown on the roof plan)
- Roof plumbing (downpipe locations, gutters, etc.)
Building plans provide a detailed look at the internal layout of the building, indicating room sizes, placements of fixtures, and other critical information.
Roof Plan (1:100 Scales)
The roof plan is crucial for understanding the building’s external appearance and functionality. It should detail materials, finishes, and features.
Checklist for Roof Plan:
- Roof plan, including the direction of roof falls
- Roof materials and finishes
- Locations of solar panels, skylights, and roof vents
- Roof plumbing details, such as downpipe locations and gutters
- Construction notes
The roof plan helps visualize how the roof will be constructed and its impact on the overall design.
Elevations (1:100 Scale)
Include four full external elevations (2D).
Checklist for Elevations:
- Drawing title/labels
- Scale
- Key dimensions including sill and head heights to windows and doors
- Key-reference levels including floor level, ceiling height, and ridge levels (RLs)
- Pitch/slope of roof with lines and text
- Roof gutters and downpipes and notes
- Rainwater tank
- Solar panels
- Trees (shown but not obscure elevations; reduce foliage in CAD settings)
- Symbol key/legend if preferred
- All elevations should have notes
- Materials/cladding notes
- Identification of wall types and finishes
- Window and door-opening directions or fixed
- Window/door numbers
Elevations provide a detailed side view of the building, showing external finishes, window and door placements, and other key features.
Sections (1:100 Scale)
Sections provide a general indication of the overall construction methodology and relationship between floor, wall, ceiling, and roof elements.
Checklist for Sections:
- Room labels
- Scale
- Section-detail drawing label
- Key dimensions – height and RLs
- Major building elements annotated neatly with straight arrows
- Construction notes
- Symbol key/legend if required
Sections offer a vertical cut-through of the building, showing the relationships between different levels and structural elements.
Graphics Checklist (Appendix B)
Ensure your drawings meet architectural industry standards and approval requirements.
Graphics Checklist:
- Coversheet - Drawing list with project images (3D views, color, shaded)
- Title Block, Dwg No’s, Your Name, Project Name, Project Information, Client Details, Project Stage (CC), Date, Scales, North point to True North (on all plans)
- Drawing Scale, written in the title block and scale bar visible on the sheet
- Section and detail locations on plans – symbols with text locating drawing and sheet numbers
- Annotation, correct size text and font style readable
- Graphic quality and materials - Set to Construction Certificate requirements
- Crop region to mask edges fit to sheet
- Boundaries indicated, dimensioned with RLs on plan views
- RLs on plans, elevations, sections, and some details with each significant level dimensioned
- Drawing titles to match cover sheet drawing list information
- Ground line shown as a solid black line on elevations and sections
- Line weighting to suit elevations and details, according to drawing standards
- Adequate dimensions
- Cross-reference sections, plans, or elevations
This checklist ensures that your drawings are professional, clear, and meet the necessary standards for submission.
Tips for a Successful Submission
- Consistency: Maintain a consistent scale and orientation across all drawings. This makes it easier for reviewers to understand and compare different parts of your project.
- Clarity: Ensure all annotations and labels are clear and readable. Use standard fonts and sizes that are easily legible.
- Accuracy: Double-check all dimensions and references to avoid errors. Accurate drawings are crucial for understanding the true scale and feasibility of the project.
- Neatness: Keep your drawings neat and well-organized. This includes avoiding clutter, using clean lines, and ensuring all elements are properly aligned.
- Single PDF: Combine all drawings into one PDF file to avoid penalties. Multiple PDFs can be confusing and may result in parts of your submission being overlooked.
Common Mistakes to Avoid
- Inconsistent Scales: Ensure all drawings use the same scale where applicable. This helps maintain proportionality and makes the drawings easier to interpret.
- Missing Dimensions: Always include all necessary dimensions. Missing dimensions can lead to misunderstandings and incorrect construction.
- Unclear Annotations: Use clear and consistent annotation styles. Avoid overcrowding your drawings with too many notes in one area.
- Ignoring Context: Make sure your site plans accurately reflect the surrounding context. Include adjacent buildings, roads, and other relevant features.
- Lack of Details: Provide sufficient details in sections and elevations. This includes materials, finishes, and construction methods.
Tools and Software
- ArchiCAD: Ideal for creating detailed architectural drawings. Ensure you export all drawings to a single PDF file.
- AutoCAD: Widely used for drafting and designing architectural plans. Provides robust tools for creating precise drawings.
- Revit: Excellent for creating detailed 3D models and extracting 2D drawings. Useful for visualizing the complete project.
- Sketch Up: Great for creating quick 3D models and visualizing design concepts. Can be used to create perspective views for your project sheet.
Additional Resources
- Standards and Guidelines: Familiarize yourself with AS1100.301 Architectural Drawing standards. This ensures your drawings meet industry requirements.
- Tutorials and Courses: Consider taking online courses on architectural drawing software. Platforms like LinkedIn Learning offer comprehensive tutorials.
- Professional Feedback: If possible, seek feedback from experienced professionals. They can provide valuable insights and help you improve your drawings.
Finalizing Your Submission
- Review: Carefully review your drawings for any errors or omissions. Use the checklists provided to ensure all elements are included.
- Proofread: Check all annotations and text for spelling and grammatical errors. Clear communication is crucial in architectural drawings.
- Compile: Combine all drawings into a single PDF file. Ensure the file is properly organized with clear section breaks.
- Test Print: Print a copy of your PDF file to check for clarity and readability. This helps identify any issues that may not be visible on screen.
- Submit: Follow the submission guidelines provided by your instructor or institution. Ensure you meet all deadlines and format requirements.
Conclusion
Creating a comprehensive architectural drawing submission requires attention to detail, consistency, and a thorough understanding of the requirements. By following this guide and adhering to the provided checklists, you can produce a professional and well-organized submission that meets all standards. Remember to maintain clarity and accuracy in your drawings, and don’t hesitate to seek feedback from peers or professionals. Good luck with your assignment!